I have fallen in love and it's not with a human! That didn't sound good but who gives a crap. I am in love with my new system for organizing EVERY part of my life. This new system includes a binder full of about 40 pages of pure bliss. It will help even the most unorganized person find some peace in their world of chaos.
If you feel like your head is spinning due to following scenarios then you have come to the right place:
If you feel like your head is spinning due to following scenarios then you have come to the right place:
1. piles and piles of paperwork
2. bills to pay
3. greeting cards to mail
4. birthday's to remember
5. kids important school paperwork getting lost
6. trying to figure how much food you bought for last year's birthday party in order to plan for this years
7. forgetting what you already have in your pantry when are food shopping
8. budgeting for the holiday season
9. forgetting passwords
10. prioritizing home improvement projects
The list goes on right?!? And keeping track of all of that can be very overwhelming. What if I told you that you could access all of that information in one place. Are you jumping up and down? Because I sure was when I found this binder kit on Etsy. This kit has EVERYTHING you might need and more. The best part is it is all housed in one spot.
How I used to organize my life
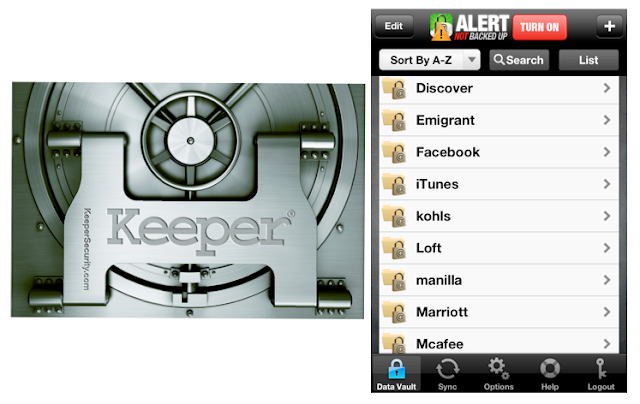
Before I share all about my new Household Binder I want to give you a little background of how I used to stay organized. If you didn't know I have a Type A personality and I don't just like everything in it's place, I LOVE everything in it's place. I already had a pretty good grip on my household organization {auto maintenance, household maintenance, updated fire extinguishers/smoke detectors, organizing/filing paperwork, and keeping track of finances}. The only problem was each area was organized in a different place. For instance: all of my passwords are kept in here in this iphone app called KEEPER...
All of my important paper documents {mortgage docs, medical forms, receipts, paystubs, etc} are stored here in my filing cabinet. Nothing fancy here but it is organized PERFECTLY to my liking.
All of my Holiday/Birthday/Special Event budgets are logged here in these notebooks. I like to keep track of old christmas shopping lists and previous birthday lists so I don't repeat gifts. I also like to keep track of how much money I gift to people for weddings, graduations, etc. so I am consistent.
All of my food shopping lists are kept here in this ShopShop app and my Target shopping lists are usually kept in my Notes app.
ShopShop App Notes App
As you can see I micromanage EVERYTHING and I am a complete control freak. I have many more apps with lots more info stored and a couple more notebooks/excel spreadsheets tracking my spending. Even though this system was working just fine, I just always had this passing thought {more like a feeling of panic} that what if something happens to my iphone/ipad/macbook pro and I lose everything? AHHHHHHHH I would DIE! I am almost too dependent on technology and that is NOT a good thing. Yes, it's great to have an iCloud account but there is still something to be said for backing everything up on a portable hard drive or keeping everything filed the good ol' fashioned way. That is theeeee MAIN reason why I love my new binder. Buying this binder kit was the BEST $40 I have ever spent. With no further ado I would love to share my new level OCD! Check her out.....
There are a wide variety of documents in this binder and to get a full list of what comes in this kit click here. I only took pictures of few of my sheets and then I attached some screen shots of some others. Majority of my papers are already filled out and I didn't want to reprint blank ones just for photos. I wasn't about to share all of my private biz!
I actually added some of my own spreadsheets and tried to mimic the look so I could keep the flow of my binder cohesive. I swear by this Day to Day Spending sheet. You can't budget for anything unless you know exactly what you are spending right NOW. At the end of every week I gather all of my receipts and I tally my totals here on this form. After the month is over I take those numbers and apply them to my yearly expense report {separate excel spreadsheet} which tracks my income vs. my spending for the whole year. IT'S AWESOME to see how much you can really save if you give yourself a budget and FOLLOW it.
This one is CLUTCH! I am always letting food go bad in my fridge and I never clean it out. {this might have something to do with me not cooking ....lol} This will keep me on the ball.
This Paint Reference sheet isn't included in the binder kit either. It was an old freebie over at IHeart Organizing.
Here are a couple screen shots of some spreadsheets that I couldn't share because they are all filled with my personal info. I use these the most....
Front pockets are great for housing stamps, labels, weekly receipts, and greeting cards....
I actually added some of my own spreadsheets and tried to mimic the look so I could keep the flow of my binder cohesive. I swear by this Day to Day Spending sheet. You can't budget for anything unless you know exactly what you are spending right NOW. At the end of every week I gather all of my receipts and I tally my totals here on this form. After the month is over I take those numbers and apply them to my yearly expense report {separate excel spreadsheet} which tracks my income vs. my spending for the whole year. IT'S AWESOME to see how much you can really save if you give yourself a budget and FOLLOW it.
This one is CLUTCH! I am always letting food go bad in my fridge and I never clean it out. {this might have something to do with me not cooking ....lol} This will keep me on the ball.
There are a bunch of pages that I am not using from this kit because I don't need them {yet} = babysitter notes page, petsitter notes page, & contacts list. With all of the pages I am using I have a total of 7 different sections in this binder. {7 Sections: everyday stuff, finances, design work, all things kitchen, party planning/events/holidays, all things blog, & household maintenance} One of my favorite sections is my Design Work tab. I keep lots of helpful documents here. I have a growing list of DIY projects and the steps for attacking them along with a 3 1/2 page long list of all the paint colors I have used in the past 5 years. This makes remembering some of my favorite colors super easy.
FYI- I created this form and it won't be found in the purchased kit
This Paint Reference sheet isn't included in the binder kit either. It was an old freebie over at IHeart Organizing.
ARE YOU IN LOVE YET?
I am such a dork and I get WAY too excited about this kind of stuff but I know I am NOT alone. I know lots of people probably already clicked on the Etsy link and purchased their own binder kit before they finished reading this post and that makes me so happy. Please let me know if you purchase it, I would love to hear about your transformation. I'll be back soon to share how I made my own dividers/folders for my binder.
Well... are you thinking I am a total psycho and I am way too organized or are you wanting to jump on the bandwagon? Dish.....
A special THANKS to Jen over at IHeart Organizing for doing all of the leg work to make this awesome binder kit for all of us!


