Monday, January 21, 2013

My Sister's Family Room- Partially Done

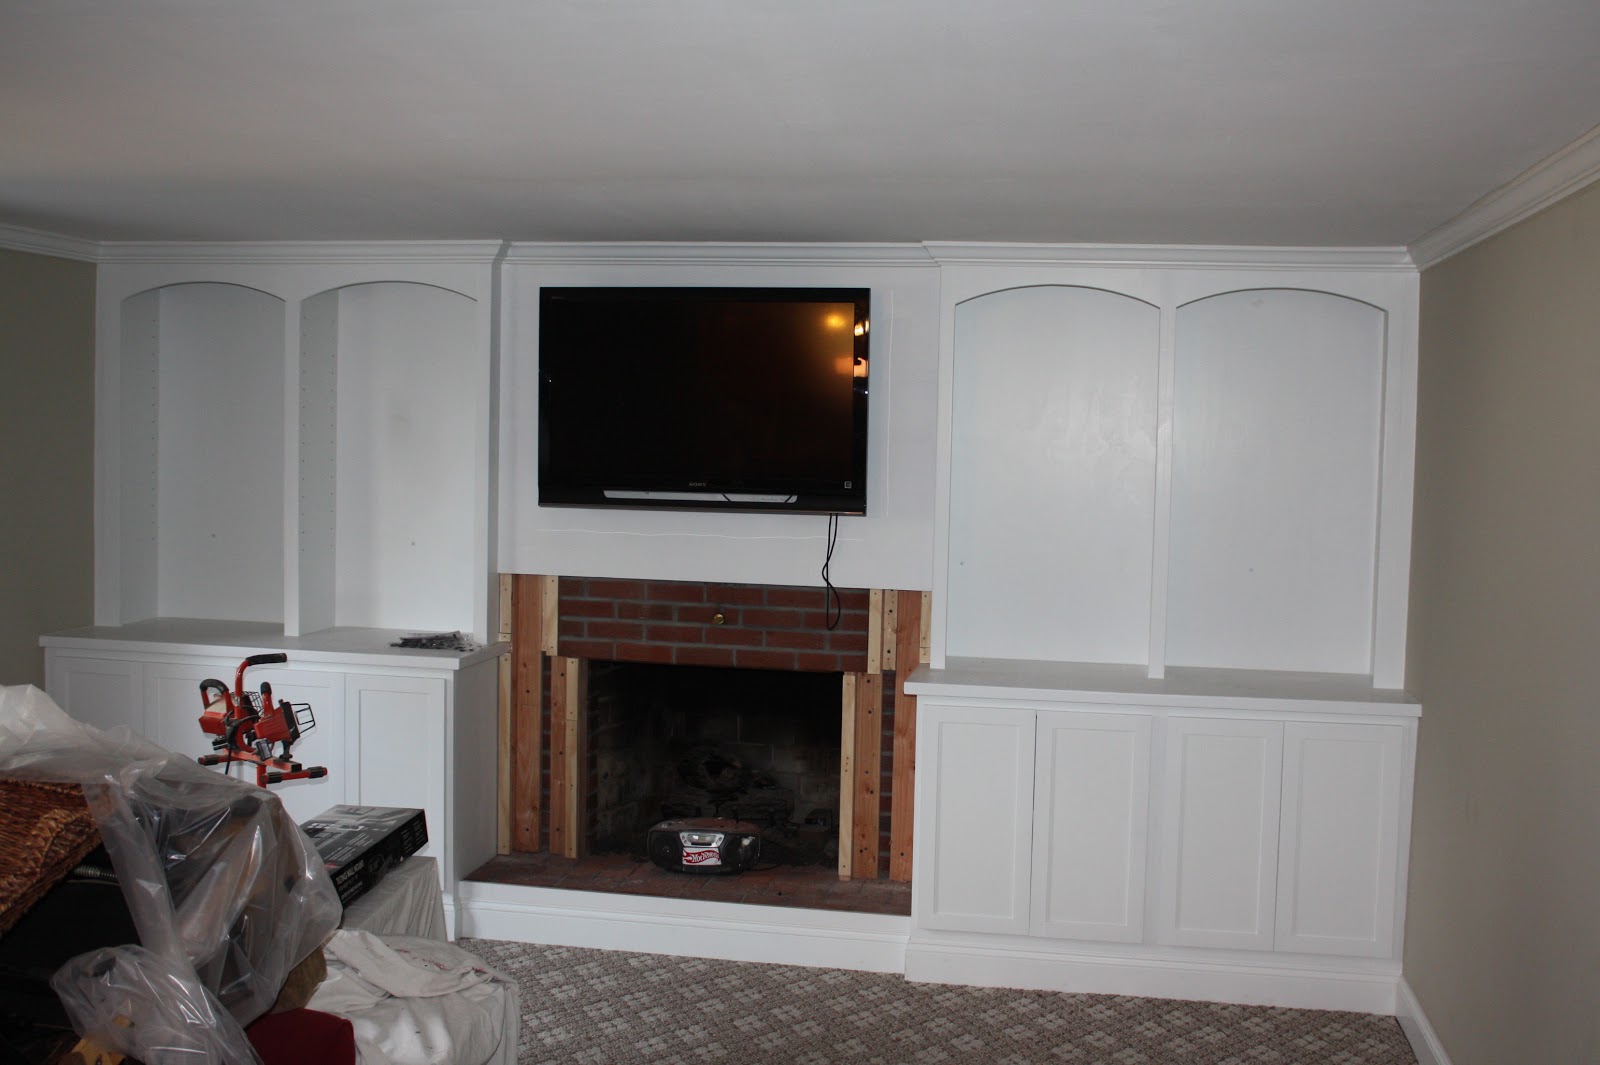
Okay here's the moment we have all been waiting for, well the moment "I" have been waiting for... our semi-finished built-ins!!!! {Minus the mantel and fabric backed shelves}  

Well???? What do you think?

I couldn't resist posting this, I know we aren't finished yet but I just had to share some of it's awesomeness.  My sister was having a birthday party for one of her little ones and Don had just finished the stone and hearth so we decided to throw some accessories up there and showcase it.  It REALLY looks like a completely different room now.  


 I loaned a lot of the accessories to my sister because I just couldn't stand the shelves being empty knowing she was having a party.  We also decided on going with dark cabinet pulls to tie in all of the dark accents in the room. 


As soon as the party was over, my sister smiled at me and said "you can leave all of your accessories here for a while!" YEAH RIGHT, I am totally taking everything back....LOL! 

I am super stoked about this next part of the project.  We finalized our fabric choice to line the back of the shelves.  It's a gorgeous floral/damask print and it really pops with the new fireplace stone and hearth. Here is a glimpse of it...


I'll be back with another post to show you how we are planning to line the backs of the shelves with the fabric.  We might also paint them in case we get tired of the fabric and still want a punch of color.

There is still a ton to do in this room. 

Here is our list: 
1. New furniture (maybe a teal sofa)
2. Install the mantel
3. Paint the room a darker gray color
4. Paint the backs of the shelves
5. Line the back of the shelves with fabric
6. Accessorize after we get the new furniture
7. Fresh coat of white paint on the one brown door in the room and replace the other brown door.


That's about it!  I will take pics of the entire room for my next post so you can see the new molding and the existing furniture.  So sorry that it took me forever to post this, our whole family was battling the flu just like the rest of the world.

Soooooo.....what do you think? Are you dying to see that fabric in the shelves?  I know I am!  I will be back soon I promise...


Saturday, January 5, 2013

My Sister's Family Room Progress- Getting There

I'm so stinkin excited about these built-ins. Last time I blogged we were almost done installing the built-ins and finishing them up with molding. I am so glad to be back to share how awesome they look and they aren't even painted or accessorized yet!  I CANNOT wait to get crackin on these guys and give them those finishing touches that they are in need of.  


Two coats of Primer finished....


The crown molding went up around the room and continued over top of the built-ins to give them that finished look.  Don also took the baseboard molding and finished off the bottom of the built-ins and the bottom of the hearth to hide that ugly brick.  


TV was hung with a tilted mount and Don did an amazing job installing the outlet in the correct place and also creating this neat little pass through to fish any component wires in and out when needed.  {don't mind the cord hanging down we were just testing to see if everything was working once plugged in}


 So the plan is to put a shelf at the exact height of the pass through so the cable and dvd/PS3 boxes will sit right next to it making it super easy to plug the cords in. He also installed an outlet on the pass through contraption so that we can get power from up on the shelf.  I love how easy this is. 

Here it is... close up. Genius right???
{We don't have the cable box hooked up yet but we tried it once to double check the ease of the pass through and it is PERFECT}


We had thought about fishing all wires down into the cabinets but Holly and Tom wanted all that space for toys, dvds, and more toys.  They have 4 kids so I'm sure all of you moms can relate to all of the crap  that they have accumulated through the years. 


The fireplace surround is almost ready to be refaced with some gorgeous stacked stone. They have a gas insert so we had to make sure it was okay to frame out the base for the stone with wood SO close to the insert.  We were cleared and ready to go. Say goodbye to the ugly brick!!!! {Don't get me wrong I love brick but this brick was not working for this space}


The mantle will be installed after the stone and that will finish up this massive project. 


  My sister and I ran over to Ideal Tile and we went right to the stone yard and checked out all of the remnants{left over stone slabs=Super cheap}. We knew we wanted something dark with hints of grays and blues. Check out the slab of granite we picked for the hearth.


It was long enough for us to cut 60" out of it and as soon as we saw that we were sold. 
 $250 bucks later we had ourselves a new top for our hearth. 


Then we went back to the Tile Shop to purchase the stacked stone that we had our eyes on from the very beginning. Isn't it GORGEOUS? The pic is a little blurry but you get the idea.  It is a stunning dark gray that is really going to pop off of all the white cabinetry.  


Here is the stacked stone and hearth getting installed.  It's almost finished! 


I'll be back with better photos of everything REAL SOON.  We also have amazing plans for the bookshelves {maybe painting or adding fun fabric to the backs of them

I'll leave you now some pretty amazing before and during shots of this space.  TOTAL TRANSFORMATION....


Related Posts Plugin for WordPress, Blogger...