Last Spring I fell in love with a moroccan wallpaper I saw online but it was super expensive = total bummer. As you know I live in a condo and I didn't want to wallpaper an entire room and then worry about having to take it down when it comes time to sell. I don't plan on extending my stay here but I still want to make this place MINE! I have this one wall that I thought would be an awesome accent to my upstairs hallway. In this hallway you can access the washer/dryer and my calendar station, so to me it isn't just a hallway, it's an actual living space. The wall was still the original creamy yellow color that was here when I bought the place, so the goal was to find an awesome stencil that resembled the moroccan wallpaper to change out that boring color.
When I found my bathroom wallpaper here, I had also found this stencil website and that's where I came across this patterned stencil. It looks EXACTLY like the wallpaper I wanted but the best part was I could choose whatever colors I wanted because I was doing the painting. I started to google rooms that have been stenciled before to get some "how to" advice. I saw that a bunch of women on different blogs had also stenciled before and they said it was time consuming but fairly easy if you have the right tools. I was up for the challenge even though I was 8 mos prego...lol...what was I thinking? It took me 4 hours from start to finish. It was SOOOOOO worth it. I freakin love walking passed this wall EVERY. SINGLE. DAY. It makes me smile for no reason and I love that. I actually want to do laundry even more now because I get to stare at my awesome work =) =) =) Check out this before and after shot.
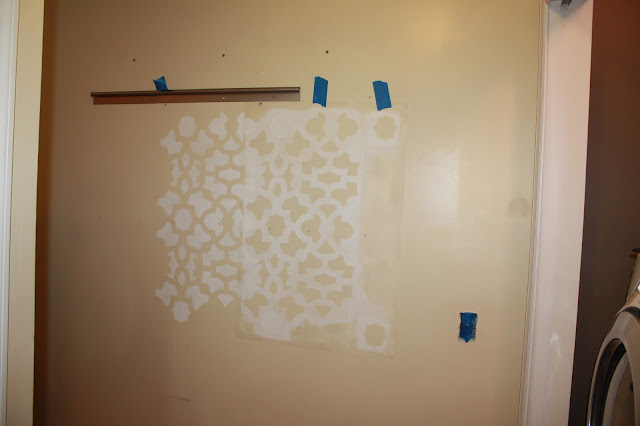
I am going to share some of the steps I took to attack this project. I started off by keeping one of my brackets from my calendar station up to use as a guide to keep the stencil level.
I used blue painters tape and a little spray adhesive{sprayed on the back of the stencil- same adhesive I used to line my nephew's dresser} to help keep the stencil pressed smoothy against the wall so no paint would bleed through. I also used a small foam roller to apply 2 light coats. Less is more people!!!!

I started in the center of the wall and worked my way out. Yes, you do have to overlap in some areas so I would suggest grabbing a blow dryer to dry those small areas before you place the stencil on top.
I definitely recommend taping off your trim so you when it comes time to do the edges you can be as sloppy as you want. The stencil does curve with the wall but it does make it easier if you have a small artist brush to fill in any unreachable spots.
Stenciling wasn't nearly as hard as I thought it would be. Using the spray adhesive really helped keep the stencil flat and that was my biggest worry. Looking good right?
 All I have left to do is above my level line. I was so stinking happy to be done at this point. I do not recommend stenciling while prego. It sucked to climb the ladder and then bend down to do the lower parts. NO FUN! But again I have to admit I would do it all over again in a heartbeat!
{Don't mind the blurry spots, its the glare from my flash}
One of my favorite things about stenciling is that once you finish your last section you can immediately start hanging things because the center of the walls are always dry before you even finish.
If you haven't noticed I'm loving teal & hot pink right now! I have splashes of it all over my house.
I even threw some teal & pink into my laundry nook....
I can't help but smile in the most random places in my home and that's what it's all about kids. We live in these spaces day in and day out so why not make them our OWN! I hope you are feeling inspired to make a forgot about space or wall something special for your eyes only!


