Friday, October 26, 2012

New Labels for My Gift Wrap Station

TGIF....
Ahhh... the weekend is here and Hurricane Sandy is a brewin!  This might be the perfect time to stay home and reorganized some messy areas in your home. I plan on getting my finances in check with my new household binder kit that I ordered off of Etsy.  Keep an eye out next week for that post.  It's gonna be a good one!  In the meantime I wanted to share a small update I made this week.   Do you remember when I posted not too long ago about my oh so organized gift wrap station? I am still so giddy about this storage solution secretly tucked away in my hall closet.  You won't believe how much this little compact station can store.  The only thing I wasn't in love with were my labels. I just wasn't feeling them so I ripped them off and threw them out.  Ahhhhh....I love starting with a clean slate.  CHANGE IS GOOD right? That is my motto.  My boyfriend laughs every time we talk about our house and how often I am changing the decor.  Never a dull moment in this condo and he loves it! Alright, so here are my labels before....


And here they are now...


I came across these Martha Stewart labels and they were just what I needed.  They have a sticky back which makes them super easy to attach to almost anything and they are compatible with avery labels.  SCORE! Super duper convenient because I use avery labels for everything. {yay...one less thing to buy


It's the simple changes that make me the happiest!  No detail left undone..... 

Now over to you!  What other ways are you labeling things around your abode?   


Wednesday, October 24, 2012

DIY Tissue Box

I've always been so annoyed by the ugly paper boxes that tissues come in.  I like to keep them hidden away in a cabinet somewhere so I don't have to look at them standing out like a sore thumb.  I always feel bad when guests have to ask, "Hey, do you have any tissues?" I am sure they were probably thinking "WTF? Where the heck are her tissues?" I hate displaying them around the house because they are just not attractive to say the least. But they ARE a necessity so my goal was to create something that would help them fit right in to the world of cute accessories. Check out my new home for all of my boogie grabbers....


Here is what I did...

I went and bought this wood tissue box cover for $2 bucks at a local craft store.


Then I slapped some paint on it.  I chose a neutral dark gray color {Behr's Creek Bend} that will be versatile for the whole year. I wanted to be able to get my 2.00 money's worth...lol!  I am all about stretching a buck.  

Yes, this is a mason jar housing some touch up paint from another job. I am sure you are wondering why I keep my paint in there but I will explain.   I saw this post on one of my favorite blogs {IHeart Organizing} and I knew I had to do it.  The blog post was about finding a more effective way to store left over paint.  I will post about how I applied that idea to my world of living in a condo and having no storage space for crap like, PAINT!   Did I mention I LOVE to paint so can you imagine all of the paint cans that I have....yea it's no joke. So far, these mason jars are clutch for when I want to do small paint jobs or do a quick touch up on a wall. THANK YOU to Jen over at IHeart Organizing for her genius idea...


I purchased these chalkboard labels for my kitchen canisters a while back and I had a few left over so I decided to slap one on.  Can you say OBSESSED with labeling?  I have a small addiction...lol or maybe it's a BIG addiction considering I just labeled a tissue box!?!? Who does that?

THIS GIRL does....

I have a ton of red accents in the lower level of my condo so this red ribbon was just the right splash of color this tissue box needed.  


I can also switch out the ribbon for different holidays.  Hot pink for Valentine's day, Green for St. Patty's day, and of course Orange for Halloween....


I am in love with this tissue box. Sometimes I walk by it and grab a tissue for no reason....I'm such a nerd!  Now I feel comfortable leaving tissues out in the open and making them a part of my decor.  I actually want my guests to have to grab one, is that mean?  Anyone else have any fun tricks for sprucing up a tissue box or any other item you don't want messing up the decor in your home? Do tell.....


Tuesday, October 23, 2012

Military Themed Dresser- Part 2

I am so stoked about sharing the progress on my latest dresser project. The goal was to make it resemble a military theme with out plastering it with all things warlike.  I  had mentioned in Part 1 of this makeover that I wanted to line the dresser drawers, get new hardware and do some stenciling or decals on the front of the dresser.  I still haven't decided on the stenciling part so I will continue to play around with some cute ideas before I call it a day on that idea.  Last time we talked about this bad boy I was obsessing over ASCP {Annie Sloan's Chalk Paint}.  Things haven't changed since, I just finished up painting a crown molding shelf the same "chateau gray" color. IN LOVE!   This whole room is coming together piece by piece and I don't want it to end. I love doing makeovers for my family.  I am secretly jumping up and down over in excitement to share my DIY Star Window Shades that I created on my own for this room. It's definitely something anyone could do and all it took was a little imagination.  I am so proud of myself because I don't sew and I managed to keep it that way while doing a project that should typically involve sewing. Wahooo for me!  All jokes aside I need to learn to sew.  #lazybum

Here is what the dresser looked like the last time you saw it in Part 1 of the rehab....


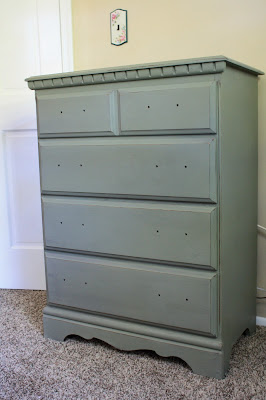
I had removed the hardware, painted 1 coat of ASCP "Chateau Gray", waxed it, distressed it and waxed it again.  Next step was to line the drawers and add some military looking hardware.

Check out how I did...


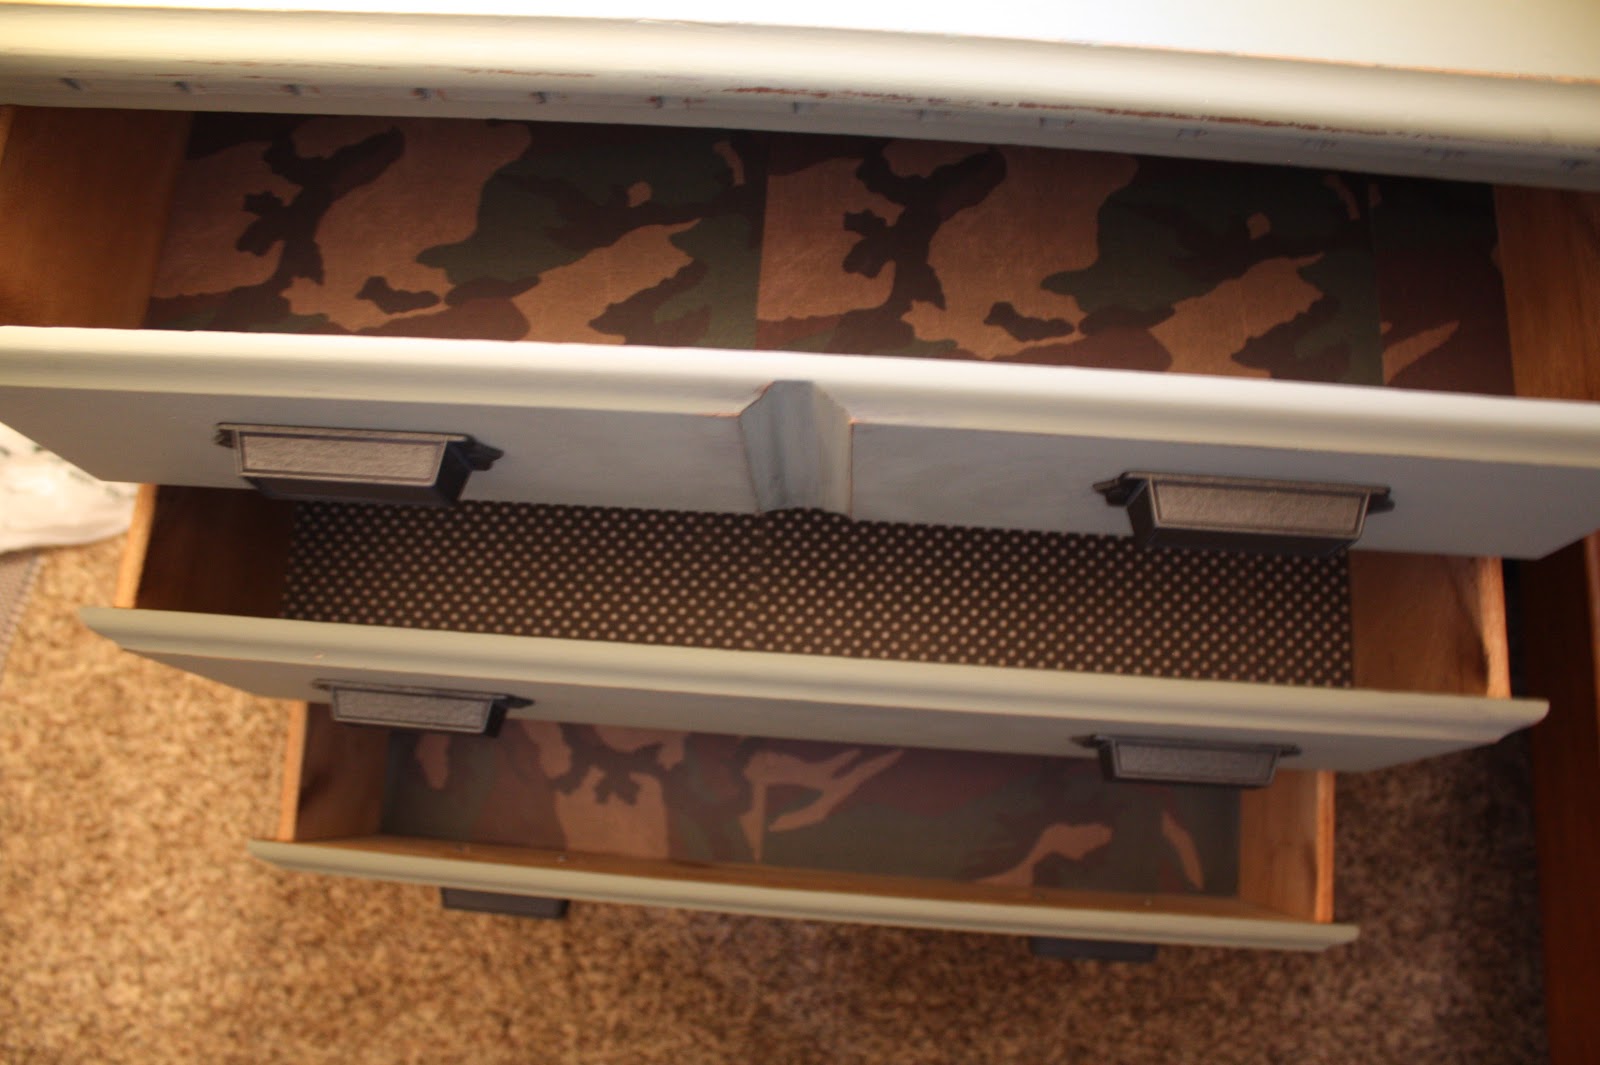
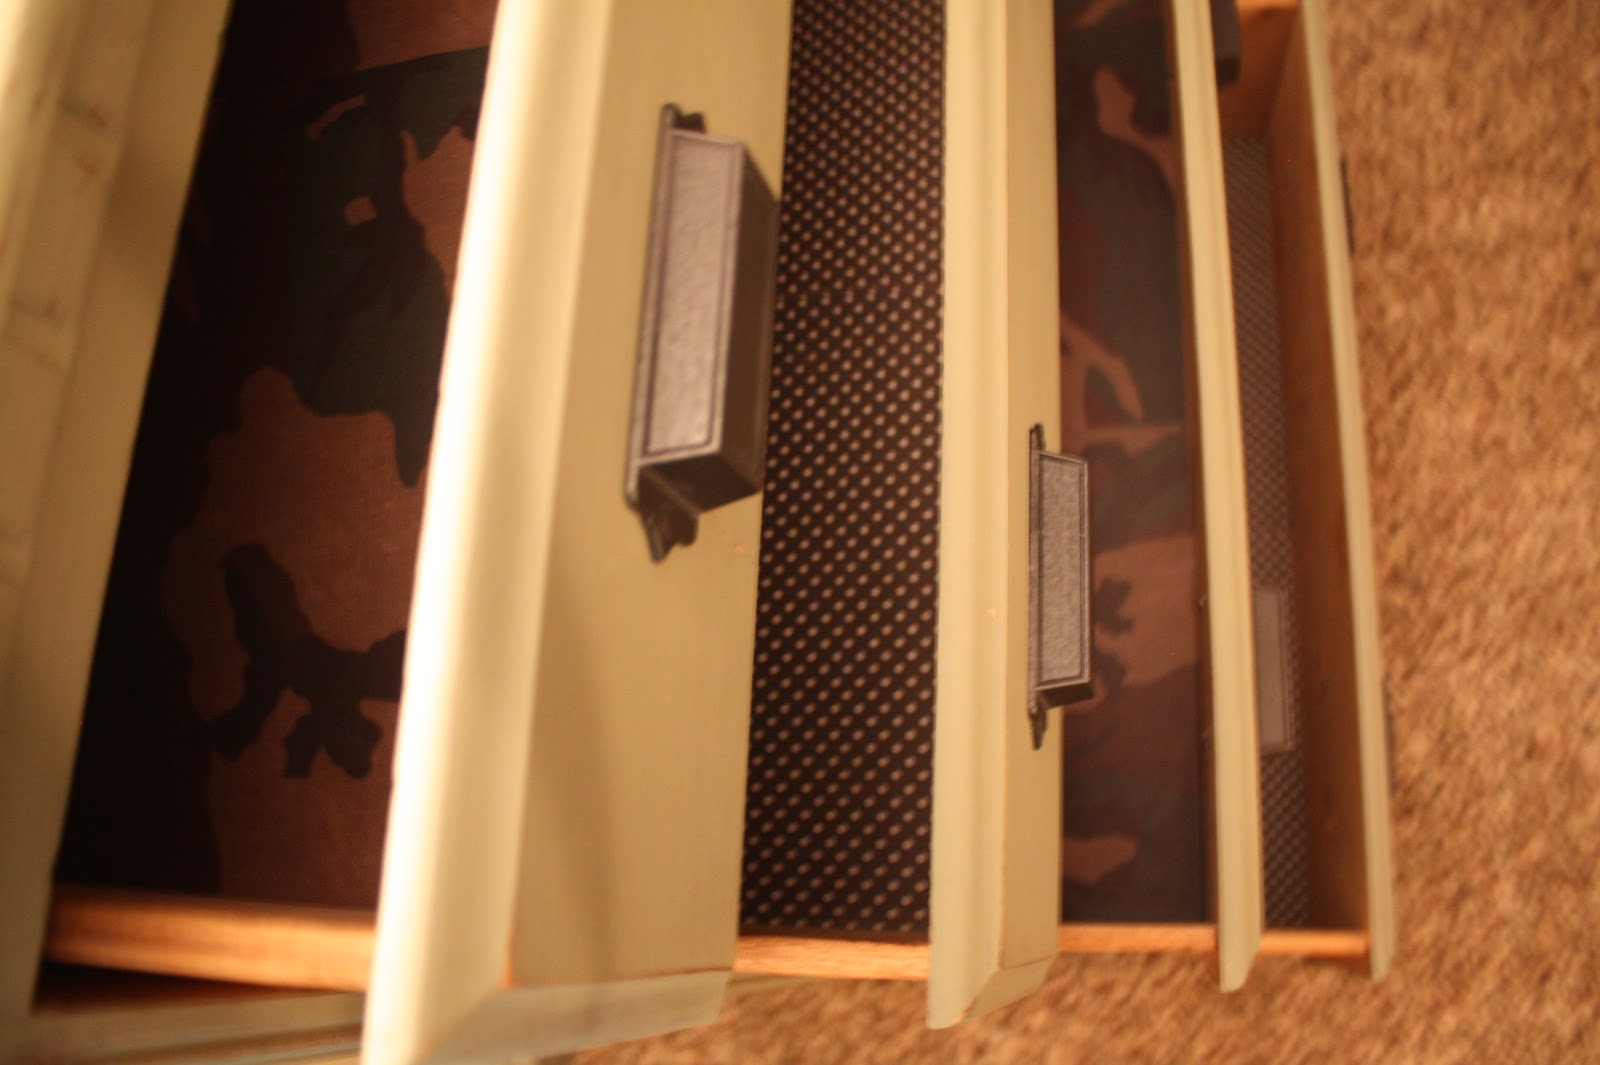
FUN....right?  I was so excited when I found this camo scrapbook paper at Jo Ann Fabrics. I also wanted to do something a little unexpected so I picked up a couple pieces of polka dot paper to keep it kid friendly.  I didn't want it to scream "Guns blazin!"

Here is a quick rundown of how I lined the drawers....


I used three pieces of paper for each drawer, two full sized pieces and one cut up piece to fill in the blanks.


Here is one drawer all set to be glued in place.


I used a spray adhesive that is PERFECT for these kinds of projects.  It doesn't lock you in place once you lay the paper down, it is forgiving and allows you to reposition as you go.  I layed a couple pieces down for a minute or two and then I realized I  wasn't happy so I pulled them all up and it wasn't an issue. Love this stuff....


I repeated the same process for the polka dot paper.


I decided to do every other drawer a different pattern to spice things up.


Believe it or not this hardware is from the Martha Stewart collection at Home Depot. Who knew? I love how these pulls have a section specifically made for labels on the front.  CLUTCH!  Tommy will soon know where all of his favorite jammies are!


I would highly recommend lining drawers and cabinets in your home.  It just gives that space an unexpected umph that will make you grin from ear to ear.  This is definitely something we do for ourselves because we all know we are the only ones seeing these drawers and cabinets on a daily basis!  Oh and remember, don't feel confined to using contact paper or shelf liner. Feel free to branch out and use scrapbook paper or even wrapping paper, they all work just fine and you will get more options that way.  I think this scrapbook paper is a major game changer for this dresser!  As the Marines say "Oohrah!" I'll be back to share my DIY Star Shades and all the finishing touches real soon....


Related Posts Plugin for WordPress, Blogger...